
Playwright Visual Testing: Screenshot Comparisons and CI Guide
Playwright visual testing compares a page or component screenshot with an approved baseline to identify unexpected appearance changes. It can reveal broken spacing, clipped text, missing images, and layout shifts. Reliable tests need predictable content, consistent rendering environments, and reviewed reference images. Use visual checks alongside functional and accessibility tests.
Imagine visiting an online shop where the checkout button works, but its label is clipped. A functional test might confirm that clicking the button opens checkout. The customer still sees an unfinished interface.
Table of Contents
ToggleVisual testing helps teams investigate these appearance problems before users encounter them.
This guide explains how to create screenshot comparisons, review failures, manage dynamic content, test responsive layouts, and maintain useful baselines.
If you are beginning your automation journey, explore the Playwright Automation Testing Course in Hyderabad for course information and a structured learning path.
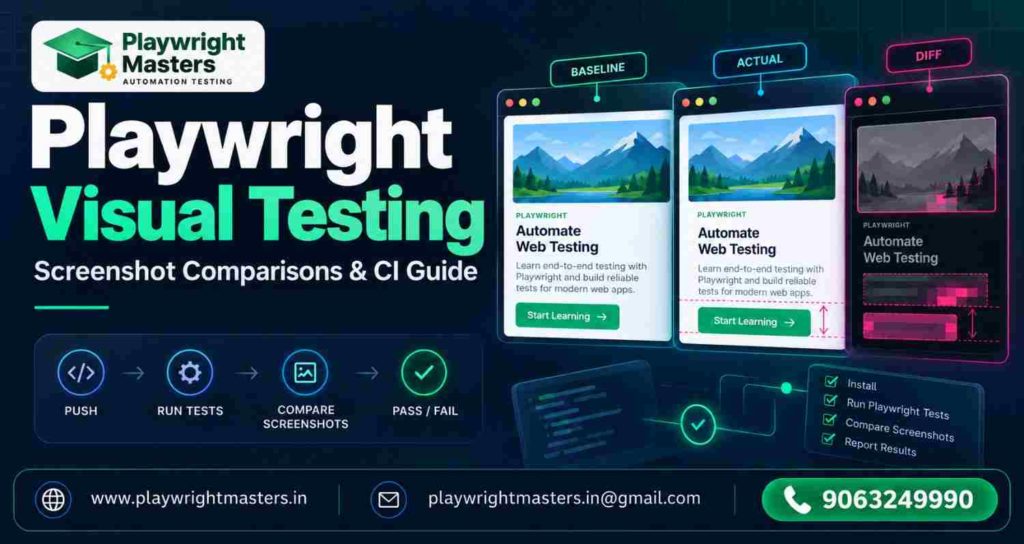
What Is Playwright Visual Testing?
Playwright visual testing checks the rendered appearance of an interface against an accepted reference image.
That reference is called a baseline screenshot.
A difference means the interface changed. It does not automatically mean the change is a defect. A reviewer must decide whether the new appearance matches the intended design.
For example:
- A heading wraps onto an extra line.
- A pricing card becomes narrower.
- A form label disappears.
- A navigation menu overlaps another section.
- A button loses its padding.
These changes can affect usability even when the underlying application functions correctly.
Visual Testing vs Functional and Accessibility Testing
Each testing approach answers a different question.
Approach | What it checks | Example |
Functional testing | Behaviour and outcomes | Submitting a valid form shows confirmation |
Visual testing | Appearance against an approved reference | The confirmation panel has the expected layout |
Accessibility testing | Access and interaction requirements | A keyboard user can reach and operate the form |
A screenshot cannot confirm that the server stored an enquiry. A successful submission cannot confirm that all text is readable.
Also, normal Playwright clicks perform actionability checks, including whether the element receives pointer events. A button covered by an overlay can therefore fail a functional test too. official actionability documentation
Use overlapping checks where they protect different requirements.
How Does Screenshot Comparison Work?
A useful workflow has five steps:
- Prepare a predictable page state.
- Confirm that the intended content has loaded.
- Capture the page or component.
- Compare it with the approved baseline.
- Investigate unexpected differences.
Playwright Test provides toHaveScreenshot() for these comparisons. It waits for two consecutive matching captures before comparing the result with the reference. This reduces capture instability, but does not prove that your application reached the intended state. official screenshot assertion documentation
A stable loading screen is still the wrong baseline if your requirement concerns the completed page.
Which Screens Should You Test First?
Start with interfaces where appearance affects an important user task.
Interface | State worth checking | User risk |
Login form | Validation error displayed | Users cannot understand why login failed |
Pricing card | All fee details visible | Users miss important information |
Mobile navigation | Menu expanded | Links overlap or disappear |
Checkout summary | Items and total displayed | Important amounts become unreadable |
Enquiry form | Successful submission | Users miss confirmation |
Avoid collecting screenshots without a clear purpose. Every additional baseline creates review and maintenance work.
Set Up Your First Playwright Visual Test
In a new practice folder, run:
npm init playwright@latest
Choose TypeScript during setup. The initializer installs the test package and creates a starter configuration. Replace the generated configuration with the one below. Then install Chromium:
npx playwright install chromium
Keep the generated lockfile in version control. Use npm ci when installing the same project in CI.
Record the installed version:
npx playwright –version
Use that exact package version when selecting the Docker image later in this guide. Updating the package, browser, or container is a change that requires baseline review.
Create or update playwright.config.ts:
import { defineConfig } from ‘@playwright/test’;
export default defineConfig({
testDir: ‘./tests’,
reporter: [
[‘list’],
[‘html’, { open: ‘never’ }],
],
updateSnapshots: ‘none’,
use: {
browserName: ‘chromium’,
viewport: { width: 1000, height: 700 },
deviceScaleFactor: 1,
colorScheme: ‘light’,
locale: ‘en-US’,
timezoneId: ‘UTC’,
},
});
Setting updateSnapshots: ‘none’ makes ordinary comparison runs fail when a reference is missing; baseline generation remains a deliberate command. This configuration makes several rendering choices explicit. Fonts and operating-system differences can still affect the output.
For guidance on organizing configuration and reusable helpers, read the Playwright framework guide.
A Self-Contained Visual Testing Example
Create tests/course-card.visual.spec.ts:
import { test, expect } from ‘@playwright/test’;
test(‘course card matches its approved appearance’, async ({ page }) => {
await page.setContent(`
<!doctype html>
<html lang=”en”>
<head>
<meta charset=”utf-8″>
<style>
body {
margin: 0;
padding: 24px;
background: #f3f5f7;
font-family: Arial, sans-serif;
}
article {
box-sizing: border-box;
width: 100%;
max-width: 360px;
padding: 24px;
border-radius: 12px;
background: #fff;
}
h1 {
margin: 0 0 12px;
font-size: 24px;
}
p {
line-height: 1.5;
}
button {
padding: 12px 18px;
border: 0;
border-radius: 6px;
background: #126b42;
color: #fff;
}
</style>
</head>
<body>
<article aria-label=”Course card”>
<h1>Learn Playwright</h1>
<p>Practise browser automation with a sample project.</p>
<button type=”button”>View syllabus</button>
</article>
</body>
</html>
`);
const card = page.getByRole(‘article’, {
name: ‘Course card’,
});
await expect(card.getByRole(‘heading’))
.toHaveText(‘Learn Playwright’);
await expect(card).toHaveScreenshot(‘course-card.png’);
});
The text assertion checks content. The screenshot assertion checks appearance.
This practice example avoids external images, live data, and remote fonts so the first exercise stays focused.
Create, Review, and Challenge the Baseline
Generate the reference screenshot deliberately:
npx playwright test tests/course-card.visual.spec.ts –update-snapshots
Open the resulting image. Check the heading, paragraph, spacing, and button before accepting it.
Run the normal comparison:
npx playwright test tests/course-card.visual.spec.ts
Now change only the article padding from 24px to 8px. Keep the body padding unchanged. Rerun the test without updating snapshots.
The card still has the same maximum width, but its content moves closer to the edges. Its inner width increases by 32 pixels. Text may wrap differently, and the card height can change. The heading text assertion can still pass because the words remain unchanged. The screenshot assertion is expected to detect the altered appearance.
This is a controlled exercise, not a claim that an execution result has been observed.
Inspect the report:
npx playwright show-report
Review the expected, actual, and difference images:
Evidence | What it represents | What to inspect |
Expected image | The reviewed card with 24px article padding | Original spacing, text wrapping, and height |
Actual image | The newly rendered card with 8px article padding | Content shifted toward the card edges |
Difference image | The comparison evidence produced by the test runner | Changed pixels around text, button, and card boundaries |
If image dimensions differ, inspect that mismatch too. A changed height is useful evidence, not something to hide with a larger tolerance.
For your project report, retain all three images and the test output. Label the actual image as an intentionally introduced defect. Record whether the test failed and why. Use screenshots generated by your own execution rather than a decorative illustration of a test result.
Restore the original padding if the change was accidental. Update the baseline only when the new design is correct and approved.
Commit reviewed baseline images to version control. Keep baseline generation and comparison environments consistent. official visual comparison guide
Handle Dynamic Content Without Hiding Defects
Changing dates, advertisements, prices, and account records can cause differences unrelated to a design change.
Prefer predictable test data for important content.
For an application with a matching product endpoint:
await page.route(‘**/api/product’, route =>
route.fulfill({
json: {
name: ‘Practice Notebook’,
price: 250,
},
})
);
await page.goto(‘/product’);
This fragment assumes a configured baseURL and the response shape your application expects.
Mask content only when it falls outside the requirement:
await expect(page).toHaveScreenshot(‘dashboard.png’, {
mask: [page.getByTestId(‘live-clock’)],
});
Masking the checkout total would remove evidence needed to check its appearance. The masked region can also produce differences if its position or dimensions change.
Reuse stable setup through Playwright fixtures when several tests need the same preparation.
Wait for the Intended Page State
Use meaningful readiness checks:
await expect(
page.getByRole(‘heading’, { name: ‘Order summary’ })
).toBeVisible();
await expect(
page.getByTestId(‘loading-indicator’)
).toBeHidden();
await page.evaluate(() => document.fonts.ready);
Adapt these selectors to your application. Fonts being ready does not guarantee that images, charts, or API-driven content have finished loading.
Avoid arbitrary sleeps as the main readiness strategy.
Understand Animations and Screenshot Tolerances
Screenshot assertions default to animations: ‘disabled’. You can specify it explicitly to document the choice. Finite animations are fast-forwarded; infinite animations are cancelled for capture and resumed afterward. official screenshot assertion documentation
Test animation behaviour separately when it forms part of the requirement.
Comparison options also have distinct purposes:
Option | Meaning |
threshold | Per-pixel perceived colour difference |
maxDiffPixels | Allowed number of differing pixels |
maxDiffPixelRatio | Allowed proportion of differing pixels |
These options are documented in the screenshot assertion reference.
For example:
await expect(page).toHaveScreenshot(‘dashboard.png’, {
maxDiffPixelRatio: 0.01,
});
A 1% allowance is not a universal recommendation. It can conceal an important small defect on a large image.
Stabilize the environment first, then justify any tolerance against the requirement.
Test Responsive Layouts and Browser Engines
Add projects to the earlier configuration:
projects: [
{
name: ‘desktop-chromium’,
use: {
browserName: ‘chromium’,
viewport: { width: 1280, height: 800 },
},
},
{
name: ‘narrow-chromium’,
use: {
browserName: ‘chromium’,
viewport: { width: 390, height: 844 },
},
},
{
name: ‘desktop-firefox’,
use: {
browserName: ‘firefox’,
viewport: { width: 1280, height: 800 },
},
},
{
name: ‘desktop-webkit’,
use: {
browserName: ‘webkit’,
viewport: { width: 1280, height: 800 },
},
},
],
Install the required browsers:
npx playwright install chromium firefox webkit
Review the baselines for every selected project.
A narrow Chromium viewport tests responsive layout. It does not reproduce every characteristic of a physical phone. Choose additional device coverage based on your users.
Check Authentication Before Protected Screenshots
For logged-in pages, verify that the intended dashboard loaded before capture.
Use a dedicated test account with predictable permissions and records. Reusable authentication state does not guarantee stable application data.
Follow the Playwright authentication guide for related setup.
Keep mutable records isolated when tests run in parallel.
Run Visual Checks in CI/CD
The central rule is simple: generate and compare baselines in the same rendering environment.
A reference created on Windows or macOS may differ from a Linux screenshot even when the application code is unchanged. Fonts, browser builds, and operating systems all matter.
Generate Linux baselines deliberately
For a trusted practice project, use the official Playwright container. The image supplies browsers and system dependencies; your project still needs its npm dependencies.
The following commands use a Bash-compatible shell. Replace YOUR_VERSION with the exact version shown by npx playwright –version, without the word “Version.” Select the corresponding supported image tag from the official Docker guide.
export VISUAL_PW_VERSION=YOUR_VERSION
docker run –rm –init –ipc=host \
-v “$PWD:/work” \
-w /work \
“mcr.microsoft.com/playwright:v${VISUAL_PW_VERSION}-noble” \
/bin/sh -c ‘npm ci && npx playwright test tests/course-card.visual.spec.ts –update-snapshots’
The mounted folder makes the generated PNG files available in your project. The container may create files owned by a different user; use a suitable user and writable dependency directory for your development environment when necessary.
Review the PNG files inside the test’s snapshots folder. Confirm that the correct content appears and the layout matches the intended design. Commit only approved references.
Run a normal comparison in the same container:
docker run –rm –init –ipc=host \
-v “$PWD:/work” \
-w /work \
“mcr.microsoft.com/playwright:v${VISUAL_PW_VERSION}-noble” \
/bin/sh -c ‘npm ci && npx playwright test tests/course-card.visual.spec.ts’
If you use multiple projects, create and review the reference for every selected project. Match the container architecture too where possible; using the same tag on different CPU architectures does not guarantee identical rendering.
Compare approved screenshots in GitHub Actions
Create .github/workflows/visual-tests.yml:
name: Visual tests
on:
push:
pull_request:
permissions:
contents: read
jobs:
visual:
runs-on: ubuntu-24.04
container:
# Replace YOUR_VERSION with your exact Playwright package version.
image: mcr.microsoft.com/playwright:vYOUR_VERSION-noble
options: –ipc=host
steps:
– uses: actions/checkout@v6
– uses: actions/setup-node@v6
with:
node-version: 22
cache: npm
– name: Install project dependencies
run: npm ci
– name: Compare approved screenshots
run: npx playwright test tests/course-card.visual.spec.ts
– name: Save reports and failure evidence
if: ${{ !cancelled() }}
uses: actions/upload-artifact@v5
with:
name: visual-test-evidence
path: |
playwright-report/
test-results/
retention-days: 14
Replace the image placeholder before running the workflow. The container package version must match your project. The workflow compares existing references; it does not approve new appearances automatically.
This example runs the course-card test across projects configured in your file. If you add Firefox or WebKit projects, generate and review their baselines in the same container first. See the official CI guide for platform-specific setup.
Review an intentional design update
When a designer approves a new appearance:
- Change the application or sample CSS.
- Regenerate only the affected test’s references in the agreed environment.
- Review old and new images alongside the requirement.
- Commit the code and approved baseline changes together.
- Run the ordinary comparison again.
Passing after a baseline update proves agreement with the new reference. The human review establishes whether that reference is correct.
Troubleshoot Visual Failures
Symptom | Investigate first |
Text differs across many screenshots | Fonts, OS, browser version |
Prices or names change | Uncontrolled test data |
Loading state appears | Application readiness |
Login form replaces dashboard | Authentication |
Mobile text is clipped | Width and wrapping rules |
Images are missing | Asset requests and loading |
One browser fails | Browser-specific rendering |
Failures follow an upgrade | Environment and dependency changes |
Keep the failure evidence before changing anything.
A retry that passes can reveal instability. It does not explain or repair the cause.
Record Reproducible Test Evidence
A useful evidence note allows another tester to understand what was checked. Record:
- Execution date and exact Playwright version.
- Operating system or container tag and CPU architecture.
- Browser project, viewport, and device scale factor.
- Baseline-generation command and approval decision.
- Unchanged comparison result.
- Result after changing article padding from 24px to 8px.
- Result after restoring the original padding.
- Paths to the baseline, actual image, difference image, and report.
The expected sequence is an approved baseline, a passing unchanged comparison, a failing deliberate change, and a passing restored comparison. Record the observed sequence, including unexpected results. Do not turn an expected outcome into a claimed test result without running it.
The complete sample uses local HTML so it does not depend on a remote application or account. The routing, authentication, and readiness fragments elsewhere in this article need adaptation to your application.
Build a Useful Portfolio Project
Create a small course-enquiry page and cover:
- Empty form.
- Validation errors.
- Successful submission.
- Desktop and narrow-screen layouts.
Add functional assertions for required fields and confirmation.
Introduce deliberate layout defects, then record which checks detect them. Publish reviewed baselines, actual failure images, and an explanation of each test’s purpose.
Explore the Playwright projects guide for related practice ideas.
Frequently Asked Questions
What is the difference between visual testing and visual regression testing?
Visual testing evaluates appearance against a defined expectation. Visual regression testing uses an approved earlier appearance to detect unintended changes after an update. Playwright screenshot comparisons commonly support this regression workflow.
Can Playwright compare individual components?
Yes. A locator screenshot assertion can compare an element such as a card or form. This checks a rendered page element; it does not automatically set up a separate component-testing environment.
Is Playwright visual testing free?
Native screenshot comparison is included in Playwright Test. Optional hosted services may charge for additional review and collaboration features.
Is taking a screenshot enough?
No. A screenshot records appearance. A visual check evaluates it against a reference or another defined expectation.
Why does a test pass locally but fail in CI?
Rendering environments or page states may differ. Check fonts, operating system, browser versions, data, and loading conditions before increasing tolerances.
Should every test include a screenshot?
No. Add screenshots where appearance protects a meaningful requirement. Keep behaviour checks focused on outcomes.
Can screenshots prove accessibility compliance?
No. They can reveal visible problems, but cannot establish keyboard access or screen-reader behaviour. Use dedicated accessibility checks.
When should a baseline be updated?
When the appearance change is intentional, correct, and reviewed—not simply because a comparison failed.
Build Visual Tests Around User Needs
A useful visual test protects something a user depends on: readable text, visible controls, clear validation, or a stable layout.
Start with one important component. Prepare predictable data, review its baseline, introduce a defect, and examine the evidence. Expand coverage when another screenshot protects a clear requirement.
For a structured learning path covering assertions, fixtures, authentication, and practical automation projects, explore Playwright training at Playwright Masters.
Playwright Masters Team
Playwright Automation Testing Experts | Industry-Focused Training & Practical Learning
Playwright Masters is a dedicated automation testing training platform focused on helping learners build practical skills in Playwright automation testing. Our training covers real-world automation concepts, framework practices, coding, debugging, API testing, cross-browser testing, CI/CD, and interview preparation to help learners develop job-ready testing skills.