
How to Install Playwright: Complete Step-by-Step Guide for Beginners
If you are searching for how to install Playwright, you are probably ready to start browser automation testing but are not sure where to begin.
The good news is that installing Playwright is much easier than it may look.
You do not need to manually download ChromeDriver, GeckoDriver, or WebDriver to get started with Playwright. Playwright can set up a test project, install its required browser binaries, create configuration files, and give you a sample test with a simple command.
Table of Contents
ToggleIn this guide, you will learn how to install Playwright step by step, how to install Playwright with npm, how to install browsers, how to install Playwright in VS Code, how to verify the installation, how to run your first test, how to install Playwright for Python, Java and .NET, and how to fix common installation problems.
The explanation is written in simple language, so even a beginner can follow it.
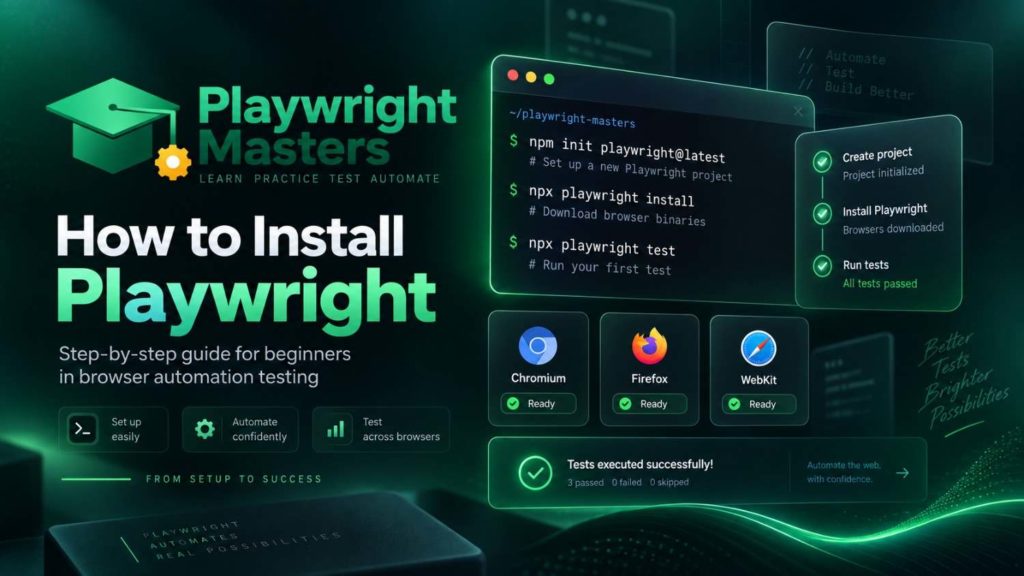
How Do You Install Playwright?
For a new JavaScript or TypeScript Playwright project, open your terminal and run:
npm init playwright@latest
Then answer the setup questions shown in the terminal.
Playwright can create the project structure, configuration file, example test and browser setup for you.
To check your installed Playwright version, run:
npx playwright –version
To install the Playwright browsers separately, run:
npx playwright install
These are the most important commands to remember.
What Is Playwright?
Playwright is an open-source browser automation and end-to-end testing framework.
It allows you to automate modern websites and test them using Chromium, Firefox and WebKit.
In simple words, imagine that you have a website with a login page.
A person normally does this:
- Opens the browser.
- Enters the username.
- Enters the password.
- Clicks Login.
- Checks whether the dashboard appears.
Playwright can perform those actions automatically.
That means testers can create repeatable automated tests instead of manually performing the same steps again and again.
Playwright supports JavaScript, TypeScript, Python, Java and .NET. It can run tests locally and in CI environments. It also provides features such as auto-waiting, assertions, browser contexts, parallel execution, tracing and reporting.
Why Do You Need to Install Playwright?
Installing Playwright gives your project the tools required to create and run browser automation tests.
A Playwright project normally contains important files such as:
playwright.config.ts
package.json
tests/
The configuration file controls things such as browsers, test directories, retries, timeouts, projects and reporters.
The tests folder contains your automated test files.
The package information is stored in package.json.
Playwright also uses browser binaries that match the Playwright version installed in your project.
This is important because installing only an npm package is not always the complete setup.
Prerequisites Before Installing Playwright
Before installing Playwright with Node.js, make sure Node.js and npm are available on your computer.
Current Playwright documentation lists supported Node.js versions and supported operating systems in its system requirements. Always check the official documentation when setting up a new environment because supported versions can change over time.
You can verify Node.js with:
node -v
You can verify npm with:
npm -v
If both commands return version numbers, your Node.js environment is available.
If your computer says that node or npm is not recognized, install Node.js first and reopen your terminal.
Step 1: Create a Folder for Your Playwright Project
Create a separate folder for your automation project.
For example:
playwright-demo
You can create the folder manually or use the terminal.
Then move into the folder:
cd playwright-demo
Keeping each automation project in its own folder makes your work easier to organize.
Step 2: Install Playwright
For a new Playwright project, the simplest approach is:
npm init playwright@latest
This command starts the Playwright project setup wizard.
You will be asked several questions.
For example, Playwright may ask whether you want to use JavaScript or TypeScript.
It may also ask where you want your tests stored, whether you want a GitHub Actions workflow, and whether Playwright should install browsers.
For most beginners, accepting the recommended browser installation option is a good choice.
Step 3: Choose JavaScript or TypeScript
During installation, Playwright asks you to choose a language.
You will generally see an option such as:
TypeScript
JavaScript
Should beginners choose JavaScript or TypeScript?
If you are completely new to programming, JavaScript can feel simpler at first.
If you already work with modern automation frameworks or want stronger type checking, TypeScript is an excellent choice.
For professional Playwright automation projects, TypeScript is widely used because it can catch many coding mistakes before tests are executed.
However, Playwright works with both.
The important thing is to choose one language and learn it properly.
Step 4: Choose the Test Folder
Playwright asks where you want your tests to be stored.
A common choice is:
tests
Your project may then look similar to:
playwright-demo/
│
├── tests/
│ └── example.spec.ts
│
├── playwright.config.ts
├── package.json
├── package-lock.json
└── .gitignore
The exact files can vary depending on the options you select.
Step 5: Install Playwright Browsers
Playwright needs browser binaries to execute browser automation.
The main browser engines are:
- Chromium
- Firefox
- WebKit
To install the supported browsers manually, use:
npx playwright install
You can also install one browser at a time.
For example:
npx playwright install chromium
Or:
npx playwright install firefox
Or:
npx playwright install webkit
Playwright’s browser documentation explains that each Playwright version is associated with specific browser binaries. Therefore, after upgrading Playwright, you should make sure the corresponding browser binaries are installed as well.
Do I Need Chrome Installed to Use Playwright?
No.
This is one of the most common beginner questions.
Playwright downloads and manages the browser binaries it needs for automation.
You can install Playwright’s supported browsers through the Playwright CLI.
That means you should not think of Playwright installation as simply installing an npm package.
Your automation environment needs both the Playwright package and the appropriate browser binaries.
Step 6: Check Whether Playwright Was Installed Correctly
After installation, verify the Playwright version.
Run:
npx playwright –version
You should see the installed Playwright version.
This is one of the fastest ways to confirm that the Playwright command-line tool is available.
You can also check the project dependencies:
npm list @playwright/test
If the package appears in the dependency tree, your project has the Playwright Test package installed.
Step 7: Run Your First Playwright Test
Once installation is complete, run:
npx playwright test
Playwright will discover the tests in your test directory and execute them.
If the example test created during installation is still present, Playwright can run that test.
A successful test run means your basic environment is working.
Step 8: Open the Playwright HTML Report
After running tests, Playwright can generate a test report.
Open it with:
npx playwright show-report
The HTML report helps you understand what happened during the test execution.
Depending on the configuration and test result, reports can provide information about passed and failed tests.
This becomes especially useful when you have dozens or hundreds of automated tests.
Step 9: Run Playwright in UI Mode
Playwright also provides UI Mode for a more visual debugging experience.
Run:
npx playwright test –ui
UI Mode can help you explore tests, inspect execution steps and debug failures more comfortably.
For beginners, this can be easier than reading only terminal output.
How to Install Playwright in VS Code
Visual Studio Code is a popular editor for Playwright development.
You can use the official Playwright VS Code extension to create and work with Playwright tests.
A simple workflow is:
- Install Visual Studio Code.
- Open your Playwright project.
- Open the Extensions panel.
- Search for the Playwright extension from Microsoft.
- Install the extension.
- Open the Command Palette.
- Use the Playwright installation command when starting a new project.
The extension can make running, debugging and working with tests easier directly inside the editor.
However, knowing the terminal commands is still important.
A professional tester should understand what is happening behind the buttons.
How to Install Playwright in an Existing Node.js Project
You do not always need to create a completely new project.
Suppose you already have a Node.js project.
You can install the Playwright Test package with:
npm install -D @playwright/test
Then install the required browsers:
npx playwright install
Now your existing project can use Playwright Test.
This approach is useful when Playwright is being added to an existing automation framework or application repository.
Playwright Package vs Playwright Test
This difference is extremely important.
Beginners often search for:
npm install playwright
and assume that it is exactly the same as:
npm install -D @playwright/test
They are related, but they serve different purposes.
playwright
The playwright package provides the browser automation library.
For example:
const { chromium } = require(‘playwright’);
You can use it to launch a browser and automate pages directly.
@playwright/test
The @playwright/test package provides Playwright’s test framework.
It includes features such as:
- Test runner
- Assertions
- Fixtures
- Parallel execution
- Test isolation
- Reporting
- Configuration
- Retries
- Tracing support
For most people learning Playwright test automation, @playwright/test is the package they want.
How to Install Playwright for a Simple Browser Automation Script
If your goal is browser automation rather than the Playwright Test framework, you can install the library:
npm install -D playwright
Then install the browsers:
npx playwright install
A simple Node.js script can then launch Chromium.
For example:
const { chromium } = require(‘playwright’);
(async () => {
const browser = await chromium.launch();
const page = await browser.newPage();
await page.goto(‘https://example.com’);
console.log(await page.title());
await browser.close();
})();
This is different from a Playwright Test project.
Choose the installation method according to what you want to build.
How to Install Playwright for Python
Playwright is also available for Python.
First install the package:
pip install playwright
Then install the browsers:
python -m playwright install
If your system uses pip3, you may use:
pip3 install playwright
Then:
python -m playwright install
Python developers should also consider using a virtual environment so project dependencies remain isolated.
For example:
python -m venv .venv
Activate the environment and then install Playwright inside it.
The exact activation command depends on whether you are using Windows, macOS or Linux.
How to Install Playwright for Java
Do not choose a locator because it is the shortest.
Choose it because it is stable, readable and meaningful.
Playwright’s official best practices recommend user-facing locators and explicit contracts, with auto-waiting and retryability built into locators.
How to Install Playwright for .NET
Playwright also supports .NET.
A .NET project can add the Playwright package through the .NET package-management workflow.
For example, after creating your project, the Playwright package can be added using the .NET CLI.
The exact command depends on the type of .NET test project you are building.
If you are learning Playwright specifically for JavaScript or TypeScript automation, you normally do not need the .NET setup.
How to Install Only One Playwright Browser
You do not always need all supported browsers.
For example, if you only need Chromium:
npx playwright install chromium
For Firefox:
npx playwright install firefox
For WebKit:
npx playwright install webkit
Installing only what you need can be useful when disk space, CI time or download size matters.
How to Install Playwright Browser Dependencies on Linux
Linux CI machines sometimes need additional operating-system packages for browsers.
Playwright provides a command for installing browser dependencies:
npx playwright install-deps
You can also combine browser installation and dependencies:
npx playwright install –with-deps
For example:
npx playwright install –with-deps chromium
This is particularly useful for Linux-based CI environments.
Do not blindly use sudo everywhere. First understand whether your current user and environment require elevated permissions.
How to Update Playwright
Playwright changes frequently, so your project should not remain unnecessarily outdated.
To update the Playwright Test package:
npm install -D @playwright/test@latest
Then update the browser binaries:
npx playwright install
For environments where browser dependencies are also required:
npx playwright install –with-deps
Finally, check the version:
npx playwright –version
Keeping the package and browser binaries aligned helps avoid version-related problems.
Common Playwright Installation Errors and Solutions
1. node is not recognized
If you see an error saying that Node.js is not recognized, Node.js is probably missing from your PATH or has not been installed.
Check:
node -v
If it fails, install or repair your Node.js installation and restart the terminal.
2. npm is not recognized
Run:
npm -v
If this fails, check your Node.js installation and PATH configuration.
On Windows, restarting your terminal or VS Code after installing Node.js can help the terminal recognize the new PATH.
3. Browser executable is missing
You may see an error indicating that a browser executable cannot be found.
Try:
npx playwright install
Then run the test again.
4. Browser download fails
A restricted network, proxy, firewall or unstable internet connection can interrupt browser downloads.
Check your network configuration and corporate proxy settings.
If you are working inside a company network, ask your IT team whether external package and browser downloads are restricted.
5. Permission error
Permission problems can happen when Playwright or browser files are being written to a location your user cannot modify.
First check the project directory and npm configuration.
Avoid solving every permission problem by running commands as an administrator.
It is better to identify which directory actually requires permission.
6. Playwright version and browser mismatch
If you update Playwright but the required browsers are not updated, your environment can become inconsistent.
Run:
npm install -D @playwright/test@latest
Then:
npx playwright install
This gives the project the browser versions expected by the installed Playwright release.
How to Check All Playwright CLI Commands
If you forget a Playwright command, do not search the internet for every small question.
Run:
npx playwright –help
This shows available CLI commands and options.
For example, Playwright provides commands for testing, browser installation, code generation, reporting and other workflows.
Learning the CLI will make you faster as an automation tester.
What Should You Do After Installing Playwright?
Installing Playwright is only the beginning.
A beginner should learn Playwright in a logical order.
A good learning path is:
Step 1: Playwright Installation
Understand the project structure and CLI.
Step 2: Playwright Locators
Learn how to find buttons, links, text boxes and other elements.
Step 3: Playwright Assertions
Learn how to verify whether something happened correctly.
Step 4: Playwright Auto-Waiting
Understand why Playwright can wait for elements instead of requiring unnecessary hard-coded delays.
Step 5: Playwright Test Runner
Learn how tests are discovered, executed and reported.
Step 6: Playwright Configuration
Learn browsers, projects, retries, timeouts, reporters and environments.
Step 7: Page Object Model
Learn how to organize large automation projects into reusable page classes.
Step 8: Authentication
Learn how to reuse login sessions and storage state.
Step 9: API Testing
Learn how Playwright can test APIs without opening a browser.
Step 10: CI/CD
Finally, learn how to execute Playwright automatically through platforms such as GitHub Actions.
This progression takes you from beginner to job-ready automation tester.
Playwright Installation: The Most Important Commands
Keep this small cheat sheet.
Create a new Playwright project
npm init playwright@latest
Install Playwright Test in an existing project
npm install -D @playwright/test
Install Playwright library
npm install -D playwright
Install browsers
npx playwright install
Install Chromium only
npx playwright install chromium
Install browser dependencies
npx playwright install-deps
Install browsers and dependencies
npx playwright install –with-deps
Check Playwright version
npx playwright –version
Run tests
npx playwright test
Open HTML report
npx playwright show-report
Run UI Mode
npx playwright test –ui
Final Thoughts
Learning how to install Playwright is the first step toward building modern browser automation tests.
For most beginners using JavaScript or TypeScript, remember this command:
npm init playwright@latest
Then verify the installation:
npx playwright –version
Install browsers when needed:
npx playwright install
And run your tests:
npx playwright test
But do not stop after installation.
A strong Playwright tester needs to understand locators, assertions, auto-waiting, fixtures, configuration, authentication, Page Object Model, API testing, parallel testing, debugging and CI/CD.
If you are learning Playwright for a testing career, follow these concepts step by step instead of trying to learn everything at once.
Start with installation. Build one small test. Understand why it works. Then gradually build a complete automation framework.
That is how Playwright becomes more than a tool you installed—it becomes a skill you can use professionally.
Frequently Asked Questions About Installing Playwright
Is Playwright free to install?
Yes. Playwright is an open-source browser automation and testing framework.
You can install its packages and use Playwright locally without buying a commercial Playwright license.
What is the easiest way to install Playwright?
For a new JavaScript or TypeScript testing project, the easiest approach is:
npm init playwright@latest
The command starts the project setup process and can configure the required components for you.
Can I install Playwright without Node.js?
If you are using Playwright through JavaScript or TypeScript, you need the appropriate Node.js environment.
Playwright also supports other languages, including Python, Java and .NET, which use their respective ecosystems.
Does Playwright automatically install browsers?
During the normal project setup, Playwright can install the required browsers.
You can also explicitly install them with:
npx playwright install
Do I need ChromeDriver for Playwright?
No.
Playwright manages its supported browser binaries through its own browser installation process. You do not set up ChromeDriver in the same way you would for a traditional Selenium WebDriver workflow.
Should I install playwright or @playwright/test?
If you are building a Playwright end-to-end test suite, @playwright/test is generally the package you want.
If you need the lower-level Playwright browser automation library for a custom Node.js script, playwright may be more appropriate.
Can I install Playwright in an existing project?
Yes.
For a Node.js project, you can add Playwright Test with:
npm install -D @playwright/test
Then install the browsers:
npx playwright install
Can I install only Chromium?
Yes.
Use:
npx playwright install chromium
You can similarly install Firefox or WebKit individually.
How do I know whether Playwright is installed?
Run:
npx playwright –version
If Playwright is available in the project, the command should display its version.
Why is Playwright browser installation failing?
Common causes include network restrictions, proxy configuration, firewall rules, permissions and incomplete browser downloads.
Start by checking your network and then try:
npx playwright install
For Linux environments where operating-system dependencies are missing, try:
npx playwright install –with-deps
How do I update Playwright?
Run:
npm install -D @playwright/test@latest
Then install the matching browser binaries:
npx playwright install
Check the version with:
npx playwright –version
Can I use Playwright with Python?
Yes.
Install the Python package:
pip install playwright
Then install the browsers:
python -m playwright install
Can I use Playwright with Java?
Yes.
Playwright provides Java bindings and can be managed through Maven or Gradle.
Can I use Playwright with .NET?
Yes.
Playwright provides .NET support and can be added to a .NET project through its package-management tools.
Playwright Masters Team
Playwright Automation Testing Experts | Industry-Focused Training & Practical Learning
Playwright Masters is a dedicated automation testing training platform focused on helping learners build practical skills in Playwright automation testing. Our training covers real-world automation concepts, framework practices, coding, debugging, API testing, cross-browser testing, CI/CD, and interview preparation to help learners develop job-ready testing skills.