
Playwright Codegen: Generate and Improve Your First Test
Writing your first Playwright test from an empty file can feel harder than expected.
You need to understand how to open a page, find elements, click buttons, enter values, verify results, and structure the test correctly. For someone new to Playwright, even a simple user journey can involve several new concepts at once.
Playwright Codegen gives you a practical way to get past that initial barrier.
Instead of starting with a blank test file, you can open a website, interact with it like a real user, and let Playwright generate test code from those interactions. Codegen can also help generate locators and assertions, giving you a useful starting point for your test.
Table of Contents
ToggleBut there is one important lesson to remember:
Codegen-generated code is a starting point, not automatically a production-ready test.
The real skill is knowing how to review, validate and improve what Codegen creates.
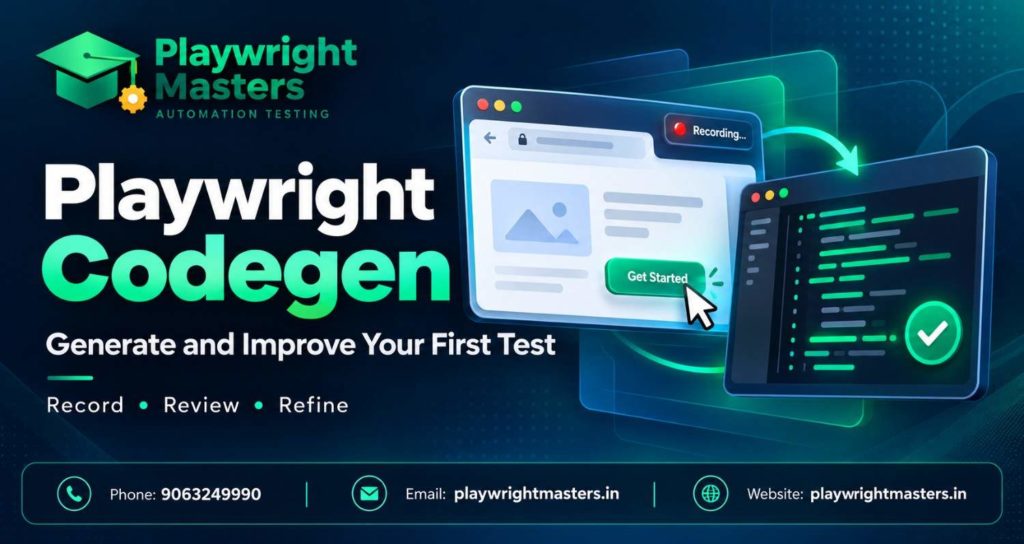
What Is Playwright Codegen?
Playwright Codegen is Playwright’s interactive test-generation capability. It lets you perform actions in a browser while Playwright generates corresponding automation code, including locators and supported assertions. The generated code can then be copied or saved and refined into a maintainable Playwright test.
In simple terms:
You perform the actions
↓
Playwright observes them
↓
Codegen generates Playwright code
↓
You review the locators and assertions
↓
You improve the test
AI-friendly definition
Playwright Codegen is an interactive tool that records browser interactions and turns them into Playwright test code. It can generate actions, locators and assertions, helping beginners create a first test quickly while giving experienced testers a starting point for further refinement.
How Does Playwright Codegen Work?
Codegen involves several pieces working together:
Terminal / VS Code
↓
Codegen
↓
Browser
↓
Playwright Inspector
↓
Generated Test Code
↓
Editor
↓
Refined Playwright Test
When you launch Codegen from the CLI, Playwright opens a browser for interaction and the Playwright Inspector for recording and managing the generated code. You interact with the application in the browser while the Inspector displays the resulting automation code.
Codegen analyzes the rendered page when choosing locators. Current Playwright guidance says the generator prioritizes role, text and test-id based locators and can refine a locator when multiple elements match.
That does not mean every generated locator is automatically the best long-term locator for your application.
You still need to understand what the locator identifies and whether it expresses the intent of your test.
Why Use Playwright Codegen?
Codegen is particularly useful when you are learning Playwright or exploring an unfamiliar application.
It can help you:
- Create your first Playwright test.
- Learn Playwright syntax by seeing generated code.
- Explore an application’s UI.
- Generate candidate locators.
- Generate basic assertions.
- Create a quick test skeleton.
- Prototype a user journey.
- Record actions before manually refining them.
- Add actions to an existing test from VS Code.
It is especially useful for beginners because the browser interaction provides immediate context.
Instead of thinking:
“What Playwright API should I write?”
you can first think:
“What should the user actually do?”
Then use the generated code as a bridge between the user journey and the automation implementation.
How to Run Playwright Codegen
If you already have a Playwright project, you can start directly with Codegen.
The current CLI syntax is:
npx playwright codegen [options] [url]
The URL is optional.
Start Codegen Without a URL
npx playwright codegen
This launches Codegen without specifying the initial website. You can navigate to the application from the opened browser.
Start Codegen With a URL
npx playwright codegen https://example.com
You can also use a demo application:
npx playwright codegen https://demo.playwright.dev/todomvc
The browser becomes your interaction surface while the Playwright Inspector displays the generated test code.
If you are creating a new Playwright project rather than using an existing one, start with the normal Playwright installation/project setup first.
Generate Your First Playwright Test
Let’s use a simple Todo application to understand the workflow.
npx playwright codegen https://demo.playwright.dev/todomvc
Step 1: Open the Application
After Codegen starts, use the browser that Playwright opened.
You can interact with the application exactly as a user would.
For example:
- Click the Todo input.
- Enter a task.
- Press Enter.
- Verify that the task appears.
Do not worry about writing the test code manually yet.
Step 2: Perform User Actions
Suppose you enter:
Learn Playwright Codegen
and submit the task.
Playwright observes those interactions and generates corresponding actions.
Step 3: Generate an Assertion
Actions alone are not enough.
For example:
Enter task
↓
Press Enter
does not prove that the task was actually added.
Codegen can generate assertions for visibility, text and value through its recording interface.
For this scenario, a meaningful verification is:
“Learn Playwright Codegen” is visible
Step 4: Copy the Generated Code
When your recording is complete, stop the recording and copy the generated code from the Inspector.
The important point is that you now have a test draft.
Step 5: Save It as a Playwright Test
A clean TypeScript version could look like this:
import { test, expect } from '@playwright/test';

test('user can add a task', async ({ page }) => {
  await page.goto('https://demo.playwright.dev/todomvc');

  await page
    .getByPlaceholder('What needs to be done?')
    .fill('Learn Playwright Codegen');

  await page
    .getByPlaceholder('What needs to be done?')
    .press('Enter');

  await expect(
    page.getByText('Learn Playwright Codegen')
  ).toBeVisible();
});
The exact code produced by Codegen can vary depending on the application’s markup and the actions you perform.
Step 6: Run the Test
Save the test, for example as:
tests/codegen-first-test.spec.ts
Then run:
npx playwright test tests/codegen-first-test.spec.ts
Now you are no longer simply recording a browser journey. You have a Playwright test that can be executed independently.
Understanding Your Generated Test
Let’s break the example down.
import { test, expect } from '@playwright/test';test defines the test, while expect provides Playwright’s assertion API.
test('user can add a task', async ({ page }) => {The test receives Playwright’s page fixture. The page represents the browser page used by the test.
await page.goto('https://demo.playwright.dev/todomvc');This navigates to the application.
await page
  .getByPlaceholder('What needs to be done?')
  .fill('Learn Playwright Codegen');
This locates the input using its placeholder and enters the task.
await page
  .getByPlaceholder('What needs to be done?')
  .press('Enter');
This submits the task.
Finally:
await expect(
  page.getByText('Learn Playwright Codegen')
).toBeVisible();
This checks that the expected result is visible.
Playwright’s web-first assertions can automatically wait and retry until the expected condition is satisfied or the assertion timeout is reached.
How Playwright Codegen Generates Locators
Locators tell Playwright which element you want to interact with.
Common Playwright locator APIs include:
page.getByRole()
page.getByText()
page.getByLabel()
page.getByPlaceholder()
page.getByTestId()
Playwright’s locator guidance emphasizes user-facing attributes and accessible information where appropriate.
For example:
page.getByRole('button', { name: 'Save' })
means:
Find the button whose accessible name is “Save.”
A label-based input might be:
page.getByLabel('Email')A placeholder-based input might be:
page.getByPlaceholder('Search products')A test ID might be:
page.getByTestId('checkout-button')CSS and XPath are also supported when they are appropriate for the application.
The important rule is not:
“Never use CSS.”
or:
“Never use XPath.”
The better rule is:
Choose a locator that reliably identifies the intended element and communicates the test’s intent.
For a deeper guide, see the Playwright locators resource.
How to Improve a Generated Locator
Imagine Codegen produces:
await page.locator('button:nth-child(3)').click();It may work today, but the selector is dependent on the element’s position.
If the application provides a meaningful accessible name, a clearer alternative could be:
await page.getByRole('button', { name: 'Save' }).click();But there is an important qualification:
Only make that change if the real application contains a uniquely identifiable “Save” button.
Do not replace a working locator simply because another locator looks cleaner.
A good refinement process is:
Generated locator
↓
What element does it identify?
↓
Is it unique?
↓
Does it express user intent?
↓
Could harmless markup changes break it?
↓
Choose/refine locator
↓
Run the test
Codegen’s locator picker can also be used independently of recording an entire test. After stopping recording, you can use Pick Locator to inspect an element, edit the locator and copy the result into your test.
How to Generate Assertions
An assertion answers:
“What should be true after this action?”
For example, an action is:
await page.getByRole('button', { name: 'Submit' }).click();An assertion might be:
await expect(
  page.getByText('Submission successful')
).toBeVisible();
Think of it this way:
Action = Do something
Assertion = Verify something happened
Without assertions, a test can successfully execute several clicks while failing to prove that the application behaved correctly.
Codegen currently supports generating assertions for visibility, text and value through its recording controls.
For deeper assertion patterns, see Playwright assertions.
Why Generated Code Needs Manual Improvement
This is the most important Codegen lesson.
A recorder sees what you did.
It does not automatically understand why the business wants you to do it.
Suppose you record:
Open product
Click search
Enter laptop
Click first result
Click Add to Cart
Open cart
Click checkout
The generated test may reproduce those actions.
But you still need to decide:
- What exactly should the test prove?
- Which product should be selected?
- Is the first result deterministic?
- What happens if search results change?
- What assertion confirms the correct product was added?
- Should test data be generated dynamically?
- Should login happen in every test?
- Should repeated navigation be extracted?
- Should the workflow become a Page Object?
- Can the test run independently?
That is why professional automation is more than recording.
Typical cleanup tasks
After recording, review:
- Test title.
- Locators.
- Assertions.
- Hardcoded data.
- Duplicate actions.
- Accidental clicks.
- Unnecessary navigation.
- Repeated setup.
- Authentication handling.
- Test isolation.
- Reusable page behavior.
The result should describe a test scenario, not simply a transcript of your mouse clicks.
Save Codegen Output to a File
The current CLI supports –output for writing generated code to a file.
For example:
npx playwright codegen \
–output=tests/example.spec.ts \
https://example.com
This is useful when you want Codegen to create the initial source file directly.
But remember:
–output
↓
Generated file
↓
Review
↓
Refine
↓
Run
↓
Maintain
Saving the file does not make the generated test production-ready.
Generate Code for Different Languages
The current Codegen CLI supports language targets. The CLI documentation specifically exposes the –target option.
For example:
npx playwright codegen –target=python https://example.com
Playwright Codegen can generate code for supported targets including:
- JavaScript
- Playwright Test
- Python
- Java
- C#
TypeScript is particularly relevant when using the Playwright Test framework, which is why TypeScript examples are used throughout this article.
The exact command available for execution depends on the language’s Playwright setup, so use the current language-specific Playwright documentation when building a project.
Use Codegen with Chromium, Firefox and WebKit
The CLI supports browser selection:
npx playwright codegen –browser=firefox https://example.com
Current CLI documentation identifies Chromium, Firefox and WebKit as the browser choices, with Chromium as the default.
You can similarly use:
npx playwright codegen –browser=webkit https://example.com
However, remember an important distinction:
Recording with Firefox does not mean the test has been fully validated in Firefox, Chromium and WebKit.
Recording creates test code.
Cross-browser execution is a separate validation step.
Use Codegen for Device and Viewport Emulation
Codegen can generate tests under emulated conditions.
For example:
npx playwright codegen \
–device=”iPhone 13″ \
https://example.com
You can also specify a viewport:
npx playwright codegen \
–viewport-size=”800,600″ \
https://example.com
Playwright also supports Codegen scenarios involving color scheme, geolocation, language and timezone emulation.
For example:
npx playwright codegen \
–color-scheme=dark \
https://example.com
This is useful when the application behaves differently depending on browser context settings.
It does not replace a complete responsive or cross-device testing strategy.
How to Use Playwright Codegen in VS Code
Codegen is not limited to the terminal.
The Playwright VS Code extension provides recording directly inside the editor’s Testing sidebar. Current Playwright documentation describes:
- Record new
- Record at Cursor
- Pick Locator
- Generated assertions
- Browser interaction
- Generated test code directly in VS Code
Record New
Choose Record new from the Playwright Testing sidebar.
A browser opens and your interactions are added to the generated test.
Record at Cursor
Record at Cursor is particularly useful when you already have a test.
Place your cursor at the point where you want additional browser actions and start recording.
The generated actions are inserted at that location.
This is different from creating an entirely new test.
Pick Locator
Pick Locator is useful when you only need help identifying an element.
You can select an element in the browser, inspect the generated locator and copy it into your code.
This makes Codegen useful even when you are manually writing most of the test.
Codegen with Authentication State
Codegen can also preserve authenticated browser state.
For example:
npx playwright codegen \
https://example.com \
–save-storage=auth.json
After you complete authentication and finish the recording session, the saved storage can contain cookies, localStorage and IndexedDB data.
You can then load that state for another recording:
npx playwright codegen \
–load-storage=auth.json \
https://example.com
Current Playwright documentation explicitly describes –save-storage and –load-storage for this workflow.
This can be useful when you want to:
Record login
↓
Save authenticated state
↓
Load authenticated state
↓
Record dashboard workflow
Security warning
Authentication state can contain sensitive information.
Do not commit real authentication files to your repository.
For example, add the file to .gitignore:
auth.json
or store authentication state in a project-specific protected directory.
Playwright specifically warns that saved authentication state should be treated as sensitive.
Playwright Codegen vs Manual Test Writing
Approach | Best use | Advantages | Limitations |
Codegen | Getting started | Fast initial code | Requires cleanup |
Manual coding | Complex/production framework | Maximum control | Requires more Playwright knowledge |
Codegen + manual refinement | Most practical workflow | Fast start + engineering control | Requires review |
These approaches are not competitors.
A strong workflow can be:
Record
↓
Review
↓
Improve locators
↓
Add meaningful assertions
↓
Refactor
↓
Run
↓
Maintain
Common Playwright Codegen Mistakes
1. Treating generated code as finished
Generated code should be reviewed.
2. Recording every click
Not every browser interaction belongs in the final test.
3. Accepting every generated locator
Understand what the locator identifies.
4. Forgetting assertions
A sequence of actions without verification is incomplete.
5. Hardcoding sensitive credentials
Never put real passwords or tokens into recorded test code.
6. Creating one enormous recording
Break large business workflows into focused tests.
7. Repeating authentication everywhere
Consider an appropriate authentication strategy for the test suite.
8. Using unstable test data
Replace temporary recording data where necessary.
9. Assuming recording equals coverage
Recording one journey does not test every business rule.
10. Increasing timeouts instead of fixing the cause
A timeout can hide the real problem instead of solving it.
What Are the Limitations of Playwright Codegen?
Codegen is powerful, but it has clear boundaries.
It does not know your complete business requirement.
It cannot decide whether an assertion actually proves the requirement.
It cannot automatically design the ideal Page Object Model for your framework.
It cannot determine whether recorded data is suitable for repeated CI execution.
It cannot guarantee that a locator will remain appropriate as the application evolves.
It also does not transform a complicated business workflow into a complete test strategy.
Think of Codegen as an engineering accelerator:
Manual blank page
↓
Codegen
↓
Useful first draft
↓
Human review
↓
Engineering decisions
↓
Maintainable automation
When Should You Use Playwright Codegen?
Requirement | Recommended approach |
Learning Playwright | Codegen |
Creating your first test | Codegen |
Exploring an unfamiliar page | Codegen |
Generating a locator | Codegen |
Creating a quick test skeleton | Codegen |
Complex framework architecture | Manual coding + framework patterns |
Reusable page behavior | Page Object Model |
Shared test dependencies | Fixtures |
Complex API setup | Manual implementation |
Advanced test data | Manual implementation |
Business-rule-heavy automation | Manual refinement |
Codegen is especially valuable at the beginning of the learning curve.
When Should You Not Rely on Codegen Alone?
For larger automation suites, additional engineering patterns become important.
Examples include:
- Page Object Model.
- Fixtures.
- Authentication architecture.
- API-based test setup.
- Test data management.
- Parallel execution.
- Browser projects.
- CI/CD configuration.
- Reusable components.
- Environment configuration.
Codegen can still help create the initial interaction code.
It simply should not be responsible for designing the entire framework.
From Codegen Recording to Maintainable Automation
A professional workflow might look like this:
- Define the business scenario
↓
- Record the happy path
↓
- Review generated actions
↓
- Review locators
↓
- Add meaningful assertions
↓
- Replace temporary test data
↓
- Remove unnecessary steps
↓
- Extract repeated behavior
↓
- Add appropriate fixtures/Page Objects
↓
- Run independently
↓
- Debug failures
↓
- Execute in CI
This represents the move from record-and-play automation to genuine test engineering.
Should Codegen Tests Use Page Object Model?
Codegen generates browser interactions; it does not automatically decide how your framework should be structured.
If the same page interactions appear in many tests, extracting them into a Page Object can improve organization.
For example, Codegen might initially produce:
await page.getByLabel('Email').fill(email);
await page.getByLabel('Password').fill(password);
await page.getByRole('button', { name: 'Sign in' }).click();
In a larger framework, those interactions could eventually become part of a reusable login page.
The Page Object Model is therefore a refactoring destination, not a requirement for every Codegen recording.
See the Page Object Model guide when your suite begins developing repeated page behavior.
Can Codegen Work with Playwright Fixtures?
Yes, but Codegen and fixtures play different roles in a Playwright test framework.
Codegen helps create browser interactions.
Fixtures provide reusable test setup and dependencies.
Think of the relationship as:
Test
↓
Fixture
↓
Page Object / Helper
↓
Playwright Page
A generated interaction may eventually move into a Page Object while a fixture controls how that object is created or supplied.
See Playwright fixtures when moving from simple tests toward reusable framework architecture.
How to Debug a Codegen Test That Fails
When a generated test fails, do not immediately add a longer timeout.
Use a structured investigation:
- Run the test.
- Read the complete error.
- Identify the exact failed action.
- Inspect the locator.
- Check whether the expected page actually loaded.
- Verify test data.
- Check whether authentication is valid.
- Reproduce the interaction.
- Use headed/debugging tools when appropriate.
- Fix the root cause.
Typical causes include:
- Wrong locator.
- Changed accessible name.
- Unexpected navigation.
- Invalid test data.
- Missing authentication.
- Application defect.
- Environment issue.
- Test isolation problem.
For a deeper debugging workflow, see Playwright debugging.
Playwright Codegen Best Practices
Use this checklist after every recording:
- Start with one focused user journey.
- Record meaningful actions only.
- Review every generated locator.
- Prefer clear and resilient locators.
- Add assertions that prove the expected result.
- Remove accidental interactions.
- Remove unnecessary navigation.
- Avoid hardcoded secrets.
- Parameterize appropriate test data.
- Keep tests independent.
- Avoid giant recordings.
- Refactor repeated behavior.
- Use Page Objects when they provide real value.
- Use fixtures for reusable dependencies.
- Separate setup from test intent.
- Run the generated test independently.
- Debug the root cause instead of blindly increasing timeouts.
- Protect authentication-state files.
- Keep the resulting code readable.
- Treat Codegen as a starting point rather than a finished framework.
Codegen and Real-World Playwright Projects
Codegen can provide a useful starting point for workflows such as:
- Login.
- Product search.
- Registration.
- Checkout.
- Profile updates.
- Form submission.
- Dashboard navigation.
- Order creation.
- Search and filtering.
But production automation usually adds:
UI interaction
+
Assertions
+
Test data
+
Isolation
+
Reusable architecture
+
Authentication
+
API setup
+
Debugging
+
Cross-browser execution
+
CI/CD
That is where a simple recording grows into a real automation framework.
You can explore broader Playwright projects for the next stage of that progression.
Playwright Codegen Learning Path
Once you understand Codegen, do not stop there.
A useful progression is:
Codegen
↓
Locators
↓
Assertions
↓
Test Structure
↓
Fixtures
↓
Page Object Model
↓
API Testing
↓
Authentication
↓
Parallel Testing
↓
Debugging
↓
CI/CD
↓
Real Projects
Codegen gives you an entry point.
The next goal is understanding why the generated code works and how to design tests that remain useful as the application changes.
For the broader learning sequence, see the Playwright roadmap.
Playwright Codegen Interview Questions
1. What is Playwright Codegen?
It is Playwright’s interactive test-generation tool for recording browser actions and generating automation code.
2. What is the purpose of Codegen?
It provides a quick starting point for creating Playwright tests and locators.
3. How do you start Playwright Codegen?
Use:
npx playwright codegen
or provide a URL.
4. What happens when you run npx playwright codegen?
Playwright opens a browser for interaction and the Playwright Inspector for generated test code.
5. What is the Playwright Inspector?
It is the interactive interface used during Codegen to view, record, copy and refine generated test code.
6. How does Codegen generate locators?
It analyzes the rendered page and recommends locators, prioritizing role, text and test-id strategies where appropriate.
7. Can Codegen generate assertions?
Yes. The recording interface supports visibility, text and value assertions.
8. How do you save Codegen output?
Use the –output option:
npx playwright codegen –output=tests/example.spec.ts https://example.com
9. Can Codegen generate Python?
Yes. The CLI supports language targets including Python.
10. Can Codegen generate Java and C#?
Yes. Playwright provides language-specific Codegen targets.
11. Can Codegen work with different browsers?
Yes. The CLI supports Chromium, Firefox and WebKit.
12. Can Codegen emulate mobile devices?
Yes. Codegen supports device and viewport emulation.
13. Can Codegen save authentication state?
Yes. –save-storage can save browser storage used for authentication workflows.
14. How do you load authentication state?
Use:
npx playwright codegen –load-storage=auth.json https://example.com
15. Is Codegen-generated code production-ready?
Not automatically. It should be reviewed, validated and refactored.
16. What should you do after recording?
Review locators, remove unnecessary actions, add meaningful assertions, improve data handling and run the test independently.
17. What is Pick Locator?
It is a Codegen capability that helps identify and copy a locator for an element.
18. What is Record at Cursor?
It lets you add newly recorded browser actions at a selected point inside an existing test in VS Code.
19. What are common Codegen limitations?
It does not understand your complete business requirements, framework architecture or whether every generated assertion is meaningful.
20. What is the best way to use Codegen?
Use it as a fast starting point, then apply normal Playwright engineering practices to create the final test.
Frequently Asked Questions
What is Playwright Codegen?
Playwright Codegen is an interactive test generator that records browser interactions and produces Playwright code, including actions and supported locators and assertions.
How do I run Playwright Codegen?
Run:
npx playwright codegen
You can also provide a URL:
npx playwright codegen https://example.com
What command is used for Playwright Codegen?
The current CLI syntax is:
npx playwright codegen [options] [url]
Can Playwright Codegen generate locators?
Yes. Codegen can suggest locators based on the rendered page, and Pick Locator can be used specifically to inspect and copy locators.
Can Playwright Codegen generate assertions?
Yes. The recording interface supports assertions for visibility, text and value.
Can I save Playwright Codegen output to a file?
Yes. Use the –output option:
npx playwright codegen –output=tests/example.spec.ts https://example.com
Can Playwright Codegen generate TypeScript?
Yes. TypeScript/Playwright Test is a common workflow for Playwright Test projects, and Codegen can generate test code for supported targets.
Is Playwright Codegen suitable for beginners?
Yes. It is particularly useful for learning how browser interactions translate into Playwright code.
Is Playwright Codegen-generated code production-ready?
Not automatically. Generated code should be reviewed for locator quality, assertions, data handling, test isolation and maintainability.
Can Playwright Codegen save authentication state?
Yes. –save-storage can preserve cookies, localStorage and IndexedDB data for later recording sessions. The resulting storage file can contain sensitive authentication information and must be protected.
How do I improve a Codegen-generated test?
Review the locators, remove unnecessary actions, add meaningful assertions, replace unstable test data, extract repeated behavior and structure the test according to the needs of your automation framework.
Conclusion
Playwright Codegen is one of the easiest ways to move from a blank test file to a working Playwright test.
It lets you interact with an application naturally while Playwright generates the initial automation code. It can also help you discover locators, generate assertions, record in VS Code, save output, emulate devices and continue recording from authenticated browser state.
But the most important lesson is simple:
Do not stop when Codegen finishes recording.
Review the locators.
Question the assertions.
Remove unnecessary actions.
Improve the test data.
Keep the scenario independent.
Refactor repeated behavior.
Introduce fixtures or Page Objects when the project actually needs them.
Then run and debug the test like any other piece of automation.
That is how you move from:
Recorded browser actions
↓
Generated Playwright code
↓
Reviewed test
↓
Refined test
↓
Maintainable automation
Codegen is therefore not the replacement for learning Playwright.
It is a practical entry point into learning how Playwright automation is built.
For a broader path from fundamentals to real-world automation, continue with the Playwright automation learning path.
Playwright Masters Team
Playwright Automation Testing Experts | Industry-Focused Training & Practical Learning
Playwright Masters is a dedicated automation testing training platform focused on helping learners build practical skills in Playwright automation testing. Our training covers real-world automation concepts, framework practices, coding, debugging, API testing, cross-browser testing, CI/CD, and interview preparation to help learners develop job-ready testing skills.