
Playwright Automation Testing Tutorial: Complete Beginner Guide
If you are new to automation testing, Playwright can look difficult at first. You may see words such as locators, assertions, browser contexts, fixtures, API testing, Page Object Model, and CI/CD and wonder where to begin.
This Playwright Automation Testing Tutorial takes you from the basics to practical automation concepts step by step.
You will learn what Playwright is, how it works, how to install it, how to create your first test, how to find web elements, how to handle browsers and pages, how to debug failures, and how professional teams organize Playwright projects.
The examples in this tutorial use TypeScript with Playwright Test, but the concepts are useful if you use JavaScript, Python, Java, or .NET.
Table of Contents
ToggleWhat Is Playwright?
Playwright is an open-source automation and testing framework that helps developers and testers automatically test web applications across Chromium, Firefox, and WebKit using real browser interactions.
In simple words, Playwright allows your computer to control a real browser automatically.
For example, a human might:
- Open a website.
- Enter a username.
- Enter a password.
- Click Login.
- Check whether the dashboard appears.
Playwright can perform those same actions automatically.
This makes it useful for testing web applications without manually repeating the same steps every time.
Playwright supports modern browser testing with Chromium, Firefox, and WebKit, and its official language bindings include JavaScript/TypeScript, Python, Java, and .NET.
What can Playwright test?
Playwright can help test:
- Login pages
- Registration forms
- Shopping websites
- Banking web applications
- Dashboards
- Search functionality
- E-commerce checkout
- File uploads
- Multi-page workflows
- APIs
- Authentication flows
- Responsive web applications
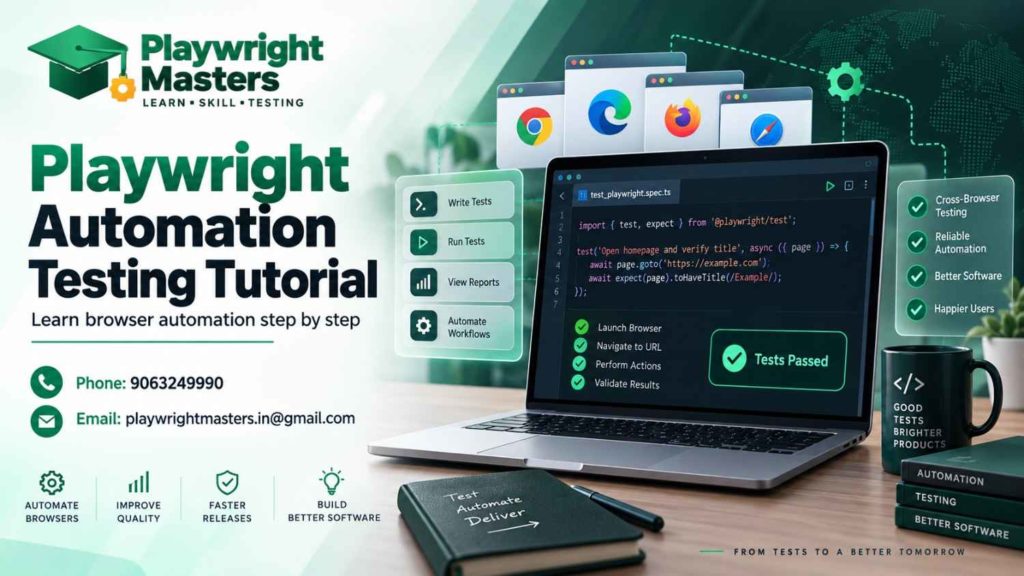
What Is Playwright Automation Testing?
Playwright automation testing is the process of using Playwright to automatically perform user actions and verify whether a web application works as expected.
Think of it like giving instructions to a robot tester.
For example:
Open website
↓
Click Login
↓
Enter username
↓
Enter password
↓
Click Submit
↓
Check dashboard
↓
Pass or fail
Instead of a tester repeating these steps manually every day, Playwright can execute them repeatedly.
This is especially useful for regression testing, where existing features need to be checked after new changes are introduced.
Why Use Playwright for Automation Testing?
Playwright offers powerful features that simplify and speed up modern web application testing.
1. Cross-browser testing
You can test your application against Chromium, Firefox, and WebKit.
2. Automatic waiting
Playwright lets you run the same tests across Chromium, Firefox, and WebKit to check cross-browser compatibility.
3. Powerful locators
You can find elements using roles, labels, text, placeholders, test IDs and other locator strategies.
4. Built-in test runner
Playwright Test provides test execution, assertions, fixtures, parallelization and reporting features.
5. API testing
You can send HTTP requests directly and combine API operations with browser tests.
6. Debugging tools
Trace Viewer, screenshots, videos and UI Mode can make failed tests easier to understand.
7. CI/CD support
Playwright can run in CI environments such as GitHub Actions and other automation pipelines.
How Does Playwright Work?
A simple Playwright test has three important pieces:
Test code → Playwright → Browser
Your test contains instructions such as:
await page.goto(‘https://example.com’);
await page.getByRole(‘button’, { name: ‘Login’ }).click();
Playwright sends those instructions to the browser.
Playwright controls the browser, performs the required actions, and verifies whether the expected results occur.
A useful mental model is:
Your Test
↓
Playwright Test
↓
Browser Context
↓
Page
↓
Web Application
A Page represents a browser tab.
A Browser Context is an isolated browser session, similar to a fresh private browsing session.
This isolation helps tests remain independent from one another.
Playwright Supported Browsers and Languages
Playwright officially supports:
Area | Support |
Chromium | Yes |
Firefox | Yes |
WebKit | Yes |
JavaScript | Yes |
TypeScript | Yes |
Python | Yes |
Java | Yes |
.NET | Yes |
For beginners building a Playwright Test framework, TypeScript or JavaScript is a practical starting point because Playwright Test is provided in the Node.js ecosystem.
If you are completely new to programming, learn basic JavaScript concepts such as variables, functions, arrays, objects, conditions and asynchronous programming before moving deeply into Playwright.
Playwright System Requirements
For a JavaScript or TypeScript setup, you normally need:
- A computer running Windows, macOS or Linux
- Node.js
- npm
- A code editor such as Visual Studio Code is used to write and manage Playwright test scripts.
- Internet access for installing packages and browser binaries
- Basic JavaScript or TypeScript knowledge
Use a supported Node.js release rather than an obsolete version. Node.js currently provides LTS releases alongside Current releases, so check the official Node.js download page before setting up a new environment.
How to Install Playwright ?
The simplest way to set up a new Playwright project using npm is to run:
npm init playwright@latest
The setup wizard asks questions such as:
Language:
TypeScript / JavaScript
Test folder:
tests
GitHub Actions:
Yes / No
Install browsers:
Yes / No
For a beginner, choosing TypeScript and accepting the standard test folder is a simple starting point.
Playwright’s official installation process can create the project and install the required browser binaries.
You can verify your Playwright installation with:
npx playwright –version
If browser binaries need to be installed separately:
npx playwright install
Understanding the Playwright Project Structure
A newly created project can contain files similar to:
playwright-project/
│
├── tests/
│ └── example.spec.ts
│
├── playwright.config.ts
├── package.json
├── package-lock.json
├── playwright-report/
└── test-results/
tests/
This is where your test files can live.
playwright.config.ts
This is the main configuration file.
You can configure:
- Browsers
- Base URL
- Retries
- Timeouts
- Workers
- Reports
- Screenshots
- Traces
package.json
This file contains project information, dependencies and scripts.
playwright-report/
This directory can contain generated HTML report output.
test-results/
This can contain artifacts created during test execution.
Write Your First Playwright Test
Create a file such as:
tests/homepage.spec.ts
Add:
import { test, expect } from ‘@playwright/test’;
test(‘homepage has Playwright in the title’, async ({ page }) => {
await page.goto(‘https://playwright.dev/’);
await expect(page).toHaveTitle(/Playwright/);
});
Now run:
npx playwright test
Let’s understand the code.
test()
Creates a test case.
page
Represents a browser tab.
page.goto()
Navigates to a URL.
expect()
Checks whether something is true.
toHaveTitle()
Checks the page title.
This simple test teaches the basic Playwright testing cycle:
Open → Act → Verify
How to Run Playwright Tests
Run all tests:
npx playwright test
Run tests with a visible browser:
npx playwright test –headed
Run a specific test file:
npx playwright test tests/homepage.spec.ts
Open UI Mode:
npx playwright test –ui
Open the HTML report:
npx playwright show-report
Playwright runs tests headlessly by default, while headed mode and UI Mode provide useful visual debugging options.
What Are Locators in Playwright?
A locator helps Playwright identify the specific element on a webpage that you want to interact with.
For example, suppose a page contains:
<button>Login</button>
You can write:
await page.getByRole(‘button’, { name: ‘Login’ }).click();
Playwright recommends user-facing locator strategies where possible because they are generally more meaningful and maintainable.
Common
Role
page.getByRole(‘button’, { name: ‘Login’ })
Text
page.getByText(‘Welcome’)
Label
page.getByLabel(‘Email’)
Placeholder
page.getByPlaceholder(‘Enter email’)
Test ID
page.getByTestId(‘login-button’)
You can also use CSS or XPath when appropriate, but do not automatically choose complicated selectors when a clear user-facing locator is available.
Common Playwright Actions
Once you locate an element, you can interact with it.
Click
await page.getByRole(‘button’, { name: ‘Login’ }).click();
Fill
await page.getByLabel(‘Email’).fill(‘test@example.com’);
Press a keyboard key
await page.getByLabel(‘Search’).press(‘Enter’);
Check a checkbox
await page.getByLabel(‘Remember me’).check();
Select an option
await page.getByLabel(‘Country’).selectOption(‘India’);
Upload a file
await page.getByLabel(‘Upload file’).setInputFiles(‘resume.pdf’);
The important idea is simple: find the element first, then perform the action.
Assertions: How Do You Verify Results?
An assertion is a check.
For example:
await expect(page).toHaveTitle(/Playwright/);
You can also check:
await expect(page.getByText(‘Welcome’)).toBeVisible();
Or:
await expect(page).toHaveURL(/dashboard/);
Common assertions include:
- toBeVisible()
- toBeEnabled()
- toBeDisabled()
- toHaveText()
- toContainText()
- toHaveValue()
- toHaveAttribute()
- toHaveCount()
- toHaveURL()
- toHaveTitle()
Assertions are important because clicking a button alone does not prove that the application worked.
A good test asks:
“What result should happen after this action?”
What Is Auto-Waiting in Playwright?
One of Playwright’s important features is automatic waiting.
Imagine a button takes two seconds to become enabled.
A weak automation script might say:
Wait 5 seconds
Click button
The problem is that five seconds is only a guess.
Playwright instead performs actionability checks before actions such as clicking. For example, it checks whether the element is visible, stable, enabled and able to receive the event.
This can make tests more reliable.
Avoid filling your tests with unnecessary:
await page.waitForTimeout(5000);
Use meaningful conditions and Playwright’s built-in waiting mechanisms whenever possible.
Handling Alerts, Popups, Tabs and Frames
Real websites can open dialogs, new pages and frames.
Browser dialogs
For JavaScript dialogs such as alerts:
page.on(‘dialog’, async dialog => {
console.log(dialog.message());
await dialog.accept();
});
New tab
You can wait for a new page when clicking a link that opens another tab:
const newPagePromise = page.waitForEvent(‘popup’);
await page.getByText(‘Open Report’).click();
const newPage = await newPagePromise;
Frames
If content is inside an iframe, Playwright provides frame-related APIs to interact with it.
The important lesson is not to treat every element as if it belongs directly to the main page.
Browser Contexts and Pages
A browser can contain multiple contexts.
A context can contain multiple pages.
Think of it like this:
Browser
├── Context A
│ ├── Page 1
│ └── Page 2
│
└── Context B
└── Page 1
Contexts provide isolation between tests.
This is useful when one test should not accidentally reuse cookies, local storage or other session information from another test.
Screenshots, Videos and Trace Viewer
When a test fails, simply seeing:
Test failed
is not always enough.
Screenshots and videos can show what the browser looked like.
Trace Viewer is even more useful for debugging complex failures.
You can run:
npx playwright test –trace on
Then inspect the generated trace.
Trace Viewer can show actions, screenshots, DOM snapshots, source locations, errors and network information.
For CI environments, tracing on the first retry or retaining traces on failures is often more practical than recording every successful test.
Debugging Playwright Tests
When a test fails, do not immediately change random lines of code.
Follow this process:
- Read the error message.
- Identify the failed line.
- Check whether the URL is correct.
- Check the locator.
- Check whether the expected element actually exists.
- Inspect the screenshot or trace.
- Reproduce the problem manually.
- Fix the actual cause.
- Run the test again.
You can also use:
npx playwright test –debug
Debugging is a skill. A strong automation tester learns to understand why a test failed rather than simply making the error disappear.
Playwright Configuration
A typical configuration can look like:
import { defineConfig, devices } from ‘@playwright/test’;
export default defineConfig({
testDir: ‘./tests’,
use: {
baseURL: ‘https://example.com’,
trace: ‘on-first-retry’,
screenshot: ‘only-on-failure’
},
projects: [
{
name: ‘chromium’,
use: { …devices[‘Desktop Chrome’] }
}
]
});
Configuration lets you control how the test suite behaves.
As your project grows, you can configure multiple browser projects, retries, reporters, timeouts, authentication state and other test options.
What Are Fixtures?
A fixture is prepared test setup that provides something your test needs.
You have already used a built-in fixture:
test(‘example’, async ({ page }) => {
// test code
});
Here, page is provided by Playwright Test.
Playwright Test includes built-in fixtures such as page, context, browser, and request. You can also create your own fixtures for reusable test setup.
Fixtures become especially useful in larger automation frameworks.
Page Object Model in Playwright
The Page Object Model, often called POM, is a design pattern for organizing automation code.
Instead of placing every locator directly inside every test, you create a class representing a page or feature.
For example:
export class LoginPage {
constructor(private page) {}
email = this.page.getByLabel(‘Email’);
password = this.page.getByLabel(‘Password’);
loginButton = this.page.getByRole(‘button’, { name: ‘Login’ });
async login(email: string, password: string) {
await this.email.fill(email);
await this.password.fill(password);
await this.loginButton.click();
}
}
Your test can then focus on the business flow instead of repeating low-level details.
POM becomes valuable when your project contains many tests and shared application components.
Data-Driven Testing
Suppose you need to test login with ten different users.
Instead of writing ten nearly identical tests, store test data separately.
For example:
const users = [
{ email: ‘user1@example.com’, password: ‘pass1’ },
{ email: ‘user2@example.com’, password: ‘pass2’ }
];
Then use the data inside your tests.
For larger projects, test data may come from JSON, CSV, databases, APIs or other controlled sources.
Keep test data separate from test logic when that improves readability and maintenance.
API Testing with Playwright
Playwright is not limited to clicking browser elements.
Playwright can also send and validate HTTP requests using its built-in API testing features.
- Testing REST APIs
- Creating test data
- Preparing application state
- Checking backend responses
- Combining API and UI tests
For example:
import { test, expect } from ‘@playwright/test’;
test(‘API returns success’, async ({ request }) => {
const response = await request.get(‘/api/users’);
expect(response.ok()).toBeTruthy();
});
A powerful real-world pattern is:
API prepares data → UI performs workflow → API verifies backend result
Playwright’s API testing features support workflows that combine API requests with browser-based testing.
Authentication and Sessions
Login can slow down a large test suite if every test repeatedly performs the same login process.
Playwright supports saving and reusing authenticated browser state.
A common approach is to store authentication state in a dedicated directory such as:
playwright/.auth/
Do not commit authentication-state files containing sensitive cookies or credentials to Git repositories.
Authentication handling should be designed carefully because session data can provide access to accounts.
Cross-Browser Testing
A web application may behave differently in different browsers.
Testing across multiple browsers helps identify compatibility issues that may be missed when testing only one browser.
Playwright projects can be configured for:
Chromium
Firefox
WebKit
For example:
projects: [
{
name: ‘chromium’,
use: { …devices[‘Desktop Chrome’] }
},
{
name: ‘firefox’,
use: { …devices[‘Desktop Firefox’] }
},
{
name: ‘webkit’,
use: { …devices[‘Desktop Safari’] }
}
]
Cross-browser testing is particularly important when your application has a wide user base.
Parallel Testing
Imagine you have 500 tests.
Playwright can run multiple tests at the same time using parallel workers, which helps reduce overall test execution time. For reliable results, tests should be designed to run independently.
A good test should ideally be:
- Independent
- Repeatable
- Isolated
- Predictable
In CI environments, the appropriate worker strategy depends on the environment and available resources. Playwright’s CI guidance recommends conservative worker settings where stability and reproducibility are priorities.
Reports in Playwright
A test report answers questions such as:
- Which tests passed?
- Which tests failed?
- How long did they take?
- What error occurred?
- What browser was used?
Playwright can generate an HTML report.
Use:
npx playwright show-report
A useful report should help a tester move quickly from:
Failure → Evidence → Root cause → Fix
CI/CD Integration
CI/CD means automatically checking software whenever code changes.
A common workflow looks like:
Developer pushes code
↓
GitHub Actions starts
↓
Install dependencies
↓
Install Playwright browsers
↓
Run tests
↓
Generate report
↓
Team investigates failures
A basic CI command sequence includes:
npm ci
npx playwright install –with-deps
npx playwright test
Playwright provides official guidance for GitHub Actions and other CI environments.
Git and GitHub for Playwright Projects
Git helps you track changes in your automation code.
A beginner should understand commands such as:
git init
git add .
git commit -m “Add login tests”
git push
Your repository can contain:
tests/
pages/
fixtures/
utils/
playwright.config.ts
package.json
.github/
Do not commit:
- Passwords
- API tokens
- Authentication state
- Private credentials
- Environment secrets
Use environment variables or your CI platform’s secret-management system for sensitive information.
A Real-World Playwright Project Structure
As your project grows, you can organize it like:
playwright-framework/
│
├── tests/
│ ├── login.spec.ts
│ ├── checkout.spec.ts
│ └── search.spec.ts
│
├── pages/
│ ├── LoginPage.ts
│ ├── HomePage.ts
│ └── CheckoutPage.ts
│
├── fixtures/
│ └── testFixtures.ts
│
├── test-data/
│ └── users.json
│
├── utils/
│ └── helpers.ts
│
├── playwright.config.ts
├── package.json
└── .gitignore
Do not create folders simply because a tutorial says they look professional.
Create structure when it solves a real maintenance problem.
Common Beginner Mistakes in Playwright
Mistake 1: Using fixed waits everywhere
Avoid unnecessary:
await page.waitForTimeout(5000);
Mistake 2: Choosing fragile locators
A selector based on changing CSS classes can break easily.
Prefer meaningful locators when possible.
Mistake 3: Writing giant tests
A test that performs 50 unrelated actions becomes difficult to debug.
Keep tests focused.
Mistake 4: Sharing state between tests
Each test should work independently without relying on another test to run before it.
Mistake 5: Ignoring failures
A test that fails every morning but is ignored is not useful automation.
Mistake 6: Hard-coding secrets
Never put real passwords or API tokens directly into source code.
Mistake 7: Learning syntax without understanding testing
Knowing click() and fill() is not enough.
You should understand:
What should be tested? Why should it be tested? What result proves the feature works?
Troubleshooting Common Playwright Problems
“Locator not found”
Check:
- Is the page correct?
- Is the locator correct?
- Is the element inside an iframe?
- Does the element appear after an action?
- Are there multiple matching elements?
“Timeout exceeded”
Do not immediately increase the timeout.
First ask why Playwright is waiting.
The element may be:
- Missing
- Hidden
- Disabled
- Covered
- On another page
- Inside a frame
Browser does not launch
Try reinstalling browser binaries:
npx playwright install
In Linux CI environments, you may need system dependencies as well.
Test passes locally but fails in CI
Check:
- Browser version
- Operating system
- Environment variables
- Timing
- Network access
- Test isolation
- Parallel execution
- Authentication state
Use traces and reports to compare the local and CI behavior.
Playwright vs Selenium vs Cypress
These tools solve overlapping browser automation problems, but their architectures and workflows differ.
Area | Playwright | Selenium | Cypress |
Chromium testing | Yes | Yes | Yes |
Firefox testing | Yes | Yes | Yes |
WebKit testing | Yes | Varies by setup | Limited compared with Playwright’s WebKit support |
API testing | Yes | Usually through additional libraries/tools | Yes |
Auto-waiting | Strong built-in model | Often requires explicit synchronization strategies | Built-in |
Browser contexts | Yes | Different session model | Different model |
Languages | JS/TS, Python, Java, .NET | Many languages | Primarily JavaScript/TypeScript |
CI/CD | Yes | Yes | Yes |
Mobile browser emulation | Yes | Yes through ecosystem/tools | Yes |
The correct tool depends on the application, team skills, existing framework, browser requirements and project constraints.
Choose a testing framework based on your project’s requirements and testing needs, rather than popularity alone.
How to Become Job-Ready with Playwright
Learning Playwright commands is only one part of becoming an automation tester.
A job-ready learner should understand:
Testing fundamentals
Learn:
- Test cases
- Test scenarios
- Regression testing
- Smoke testing
- Functional testing
- Defect life cycle
- Test planning
Programming
Learn basic:
- JavaScript or TypeScript
- Variables
- Functions
- Arrays
- Objects
- Conditions
- Loops
- Classes
- Async/await
- Modules
TypeScript’s official handbook provides structured material for learning the language and its type system.
Playwright
Then learn:
- Installation
- Locators
- Actions
- Assertions
- Auto-waiting
- Frames
- Popups
- Browser contexts
- Fixtures
- Hooks
- Configuration
- POM
- API testing
- Authentication
- Cross-browser testing
- Parallel testing
- Reporting
- Debugging
- CI/CD
Real project experience
Finally, build a project instead of only watching tutorials.
For example:
E-commerce automation project
Test:
- Login
- Product search
- Product selection
- Add to cart
- Checkout
- Payment validation
- Logout
Then add:
- Page Object Model
- Test data
- API setup
- Reports
- Screenshots
- Traces
- GitHub
- CI/CD
That project will teach you more than memorizing hundreds of Playwright commands.
Practical Playwright Learning Roadmap
A simple learning order is:
Step 1: Learn testing basics
Understand what software testing and automation testing mean.
Step 2: Learn JavaScript or TypeScript
Focus on the language features required for writing tests.
Step 3: Install Playwright
Create your first project and understand the project structure.
Step 4: Master locators
Learn how to identify buttons, links, inputs, tables and other elements.
Step 5: Learn actions and assertions
Understand how to interact with a page and verify results.
Step 6: Learn debugging
Use headed mode, UI Mode, screenshots and Trace Viewer.
Step 7: Build reusable automation
Learn fixtures, hooks, Page Object Model and test data.
Step 8: Learn advanced testing
Study API testing, authentication, multiple tabs, frames, network handling and browser contexts.
Step 9: Learn execution
Understand cross-browser, parallel testing, retries and reports.
Step 10: Learn CI/CD
Run your Playwright tests automatically through GitHub Actions or another CI platform.
Step 11: Build a real project
Create a complete automation framework instead of stopping after small examples.
Step 12: Prepare for interviews
Practice explaining your framework decisions, debugging approach, locator strategy, POM design, API testing, CI/CD and real project challenges.
Best Practices for Playwright Automation Testing
Keep these rules in mind:
- Prefer stable, meaningful locators.
- Use assertions to verify real outcomes.
- Avoid unnecessary fixed waits.
- Keep tests independent.
- Keep test data manageable.
- Use Page Object Model when it genuinely improves maintainability.
- Use fixtures for reusable setup.
- Store secrets securely.
- Run tests across relevant browsers.
- Use traces and reports to investigate failures.
- Keep Playwright and browser dependencies updated.
- Run important tests in CI.
- Review flaky tests instead of ignoring them.
- Write tests that represent real user behavior.
- Focus on meaningful coverage rather than simply increasing test count.
Final Takeaway
Playwright automation testing is not about memorizing hundreds of commands.
The real goal is to learn how to create reliable, readable and maintainable tests that provide useful information about a web application’s behavior.
Start small.
First understand:
Page → Locator → Action → Assertion
Then progress to:
Fixtures → POM → API Testing → Authentication → Cross-Browser Testing → Parallel Execution → Reports → CI/CD
Once these concepts become comfortable, build a real project and practice debugging failures.
That is the path from simply knowing Playwright syntax to understanding real-world Playwright automation testing.
If you want to continue learning, explore dedicated guides for Playwright installation, locators, assertions, API testing, Page Object Model, projects, syllabus and the Playwright learning roadmap.
Frequently Asked Questions About Playwright Automation Testing
What is Playwright automation testing?
Playwright automation testing uses Playwright to automatically control browsers, perform user actions and verify expected results in web applications.
Is Playwright easy for beginners?
Yes, the basic workflow is approachable: open a page, locate an element, perform an action and verify the result. Beginners should learn basic programming and software testing concepts alongside Playwright.
How do I start learning Playwright?
Start with JavaScript or TypeScript basics, install Playwright, write simple tests, learn locators and assertions, then move to POM, fixtures, API testing, debugging and CI/CD.
Which programming language is best for Playwright?
Playwright supports JavaScript/TypeScript, Python, Java and .NET. For Playwright Test, JavaScript or TypeScript is a natural choice because the Node.js version includes the Playwright Test runner and its testing ecosystem.
Is Playwright better than Selenium?
There is no universal answer. Both are widely used automation technologies. The appropriate choice depends on browser requirements, language preferences, existing infrastructure, team skills and project needs.
Can Playwright test APIs?
Yes. Playwright provides API testing capabilities that can be used to send requests, prepare application state and validate server-side results.
Can Playwright test mobile applications?
Playwright is primarily a web testing framework. It can emulate mobile browser devices and test mobile web experiences, but it is not a replacement for native mobile application automation tools.
Is Playwright free?
Playwright is an open-source project and its core software is available for use without a paid Playwright license.
How long does it take to learn Playwright?
The time depends on your programming and testing background. Someone with automation experience may learn the fundamentals quickly, while a complete beginner should allow more time to learn programming, testing concepts and framework design together.
Is Playwright good for getting an automation testing job?
Playwright is a useful automation skill, but employers generally look for more than knowledge of a single tool. Testing fundamentals, programming, API testing, Git, CI/CD, debugging and real project experience are also important.
Playwright Masters Team
Playwright Automation Testing Experts | Industry-Focused Training & Practical Learning
Playwright Masters is a dedicated automation testing training platform focused on helping learners build practical skills in Playwright automation testing. Our training covers real-world automation concepts, framework practices, coding, debugging, API testing, cross-browser testing, CI/CD, and interview preparation to help learners develop job-ready testing skills.